
Let’s assume we are working in the fintech domain and we have a reporting application. This application runs a scheduled job every night at 2:00 AM, which generates a report of all the transactions (such as money transfers, bill payments, etc.) that occurred throughout the day. Once the transactions are reported, they are marked as “reported” and forwarded to another system for further processing.
Now, imagine that this application is hosted on Kubernetes with multiple pods. Let’s say there are two pods, and both attempt to trigger the scheduled job at the same time. What happens in such a scenario?
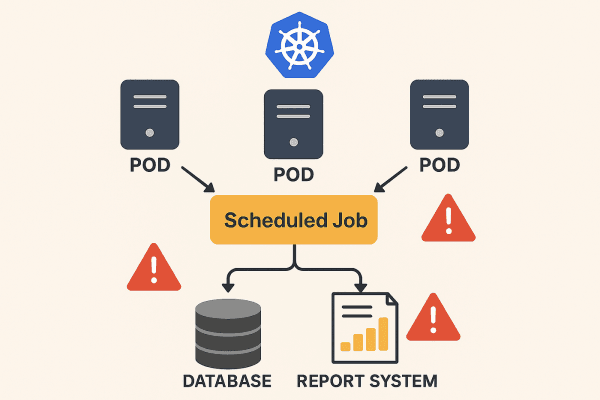
In such a case, we need to ensure that the job is triggered by only one pod. But how can we achieve that?
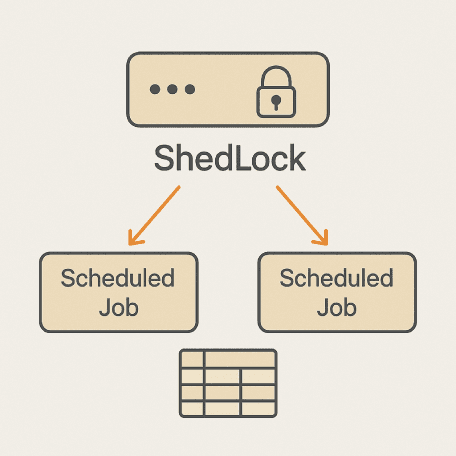
One of the most reliable and practical solutions to this problem is ShedLock. It provides a distributed locking mechanism to guarantee singleton execution of scheduled jobs across multiple instances.
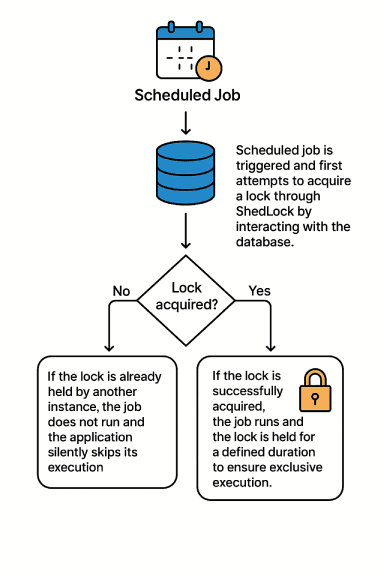
The core working principle of ShedLock is quite simple: Before the job starts, an instance attempts to acquire a lock. This ensures that even if multiple pods try to execute the job simultaneously, only the one that successfully acquires the lock will proceed. Once the job is completed, the lock is released. Importantly, this lock is not maintained in the application memory — it is stored in an external system such as a database, MongoDB, Redis, etc.
ShedLock not only acquires a lock but also controls how long the lock should be held. To manage this, it relies on two key parameters: LockAtMostFor and LockAtLeastFor.
This defines the maximum duration the lock can be held once the job starts. It serves as a safeguard to prevent the lock from being held indefinitely in case the job crashes or the application unexpectedly shuts down. For example: if lockAtMostFor = 10m, the lock will be released after 10 minutes even if the job has not completed. This allows other instances to take over the job if necessary.

This defines the minimum duration the lock should be held, even if the job finishes earlier. It is useful for controlling the frequency of rapidly completing jobs by preventing the lock from being released too soon.
For example: if lockAtLeastFor = 2m, and the job finishes in just 10 seconds, the lock will still be held for at least 2 minutes, ensuring that the job is not triggered again before the intended interval.
Now, let’s take a look at how to implement ShedLock in a Spring-based application.
First, we add the shedlock-spring and shedlock-provider-jdbc-template dependencies to our application.
To store lock information, we need to create a table in the database. Here is an example table script:
We need to define LockProvider:
We can now use ShedLock in our scheduled jobs.
The name parameter serves as the unique key for the lock record in the database. If a job with the same name is already being executed by another instance, ShedLock detects this and prevents the job from being triggered again. Therefore, each scheduled job should have a distinct name value.
So far, we’ve explored what ShedLock is, why it’s used, and how it can be implemented.
In distributed systems, uncontrolled execution of scheduled tasks by multiple instances can lead to data inconsistencies, unnecessary resource consumption, and operational failures.
ShedLock offers a simple yet effective solution to this problem. It can be integrated with minimal configuration, supports various database providers, and works seamlessly with Spring applications.
If your application uses @Scheduled annotations and operates in an environment where the same job might be triggered multiple times (especially in Kubernetes or similar container orchestration systems), ShedLock could be the right tool for you.